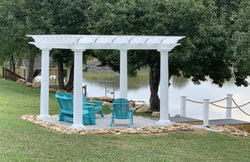


How to Install Your Traditional Vinyl Pergola - A Step by Step Video Guide
Maybe you've seen our installation guide and you still have a few questions. Sometimes it just helps to see the steps in action. Regardless of your experience level with construction, these videos will get you started in putting your vinyl pergola together.
Step 1 - Layout and Cutting
Step 1 - Layout and Cutting
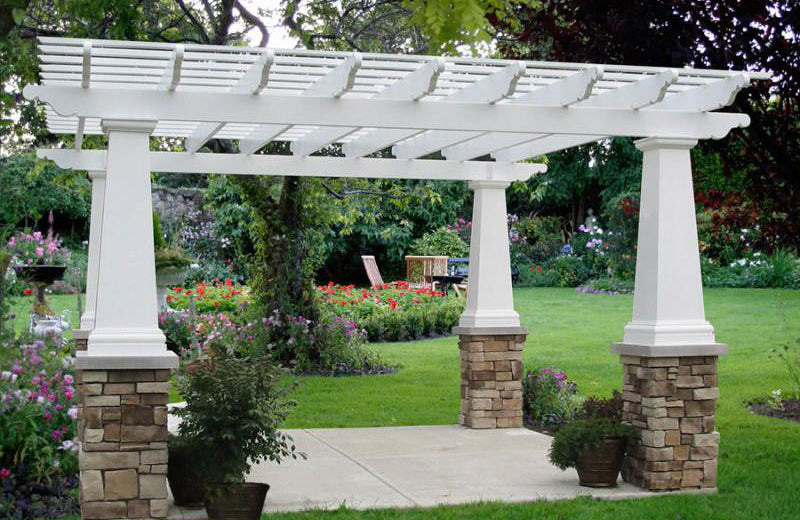
Before you begin pebbling your pergola, you need to have your post spacing and height predetermined.
- Each kit comes with a CAD drawing to assist in the layout. For example, a 12’ x 16’ pergola has a 16’ wide roof that is 12’ deep, which gives you a post spacing that is 14’ wide by 10’ deep.
- If you don’t like the spacing or it does not fit your deck or patio just right, it is not a problem.
- Each kit is trimmable and can be made to fit the size you want.
The post mount is the thickest piece of aluminum included in this kit. So, before any cutting is done, it is important to make sure you have the right type of saw and blades.
- A good saw to use is a DeWalt battery powered circular saw which is also cordless.
- It is important that the blades are carbide teeth. Some brands of blades that have carbide teeth are: 24 tooth Diablo, DeWalt 40 tooth carbide tipped, and one of the best is the non-ferrous metal, carbide tooth by CMT.
- Before cutting your post mount, it is important to have it marked out.
- To do this, use a speed square and trace a line on all four sides of the post.
- Spritz WD 40 along the mark to prevent the saw blade from getting gummed up.
- Using the circular saw, very slowly and carefully cut along the line/mark.
- Repeat the above two steps for the three other sides until the post top comes off.
Next, you will need to cut the purlin holder, beam in rafter and post sleeve.
- When cutting the purlin holder, it is important that you do not run the saw blade in the middle of the holes.
- In your layout, measure and mark your line between the holes with the speed square.
- Use the same circular saw, cut carefully and slowly, using a speed square to guide your saw.
- If there is a mark on the vinyl, use the Mr. Clean eraser that comes with the kit to remove the marks.
- When cutting the beam and rafter, this piece has aluminum inside of it.
- So, you will need to make sure that the aluminum is flushed with the end or a little bit inside.
- Spritz WD 40 where you are going to cut.
- Use the speed square, circular saw and cut carefully and slowly.
- When cutting a 7” post sleeve it is important to mark all four sides.
- Use the speed square to trace a mark all the way around since you will be cutting on all four sides.
- Use the circular saw, carefully and slowly cut all the way through one side.
- Rotate the post and cut on the mark, making sure that all four sides are cut.
- If the cuts do not line up perfectly, it is okay, because the column base will hide the cuts.
Step 2A - Install Post Mount to Deck
When attaching a post mount to a deck, the first thing to do is install the blocking in between your joist opening.
- Use three layers of treated 2x10 that are nailed together.
- Fit it down between the joist.
- Fasten securely with either nails or construction screws on as many sides as possible.
- Floor your deck with whatever flooring you choose.
Next, add your pergola post to the deck.
- Using a pencil and tape measure, mark the center of each post base.
- Use the center marks to make sure that the edge of column trim ring does not overhang the edge of the deck.
- You can refer to the installation guide for minimum post mount insets. Each pergola column option has a different inset.
- Use speed square to square it up making sure that there will be no overhang.
- Use fasteners to attach the mount down. Go around the post fastening all screws.
- Check that it is level using a torpedo or another type of level.
- If you need to, use composite shims to plumb it up.
Step 2B - Mount Post to Concrete Slab or Column Top
When you are attaching your post mount down to a poured concrete slab or a landscape column top, you want to make sure that the post mount is inset far enough from the edge so that the post base will not overhang.
- Refer to the install guide for the different measurements depending on which post came with your kit.
- Position your post mount so that the column trim ring does not overhang. When using a landscape column top, you can center the post to make it easier.
- Use a hammer drill to drill out the holes.
- Then use a 3” LDT, an expansion anchor, epoxy anchor, or whatever concrete anchor you choose to fasten the post down.
- Repeat that on every hole on the post mount.
- If you need to plumb it, use a torpedo level and a composite shim.
- If your patio is sloped so much that you have to use more than one composite shim, a longer anchor is recommended, one that is at least 2-1/2” imbedded.
Step 2C - Post Mount to Concrete Footing
This installation guide is for pergolas that have the 5” Post option.
- Once you determine your patio height, the first thing is you want to dig and pour a footing about 6 to 8 inches below your desired patio height.
- Typically, you want to use a round concrete form tube.
- Check the frost depth, may vary from 42” down to a no frost area which would be a minimum of 36” deep.
- Once the concrete is poured and set to height, mark the footing top for the center, then mark your post base for the center and line them up.
- Once your mount is in the center, use your hammer drill to drill a hole.
- You can use a large diameter tap (LDT), an expansion anchor, epoxy anchor or whatever concrete anchor you choose to mount the post down.
- Repeat the above step for every hole on the mount.
- Use a torpedo level to check if it is plumb, use a composite shim if needed.
- If you have to use more than one composite shim, a longer anchor is recommended, one that is at least 2-1/2” imbedded.
- Once the post is attached to the footing and your column is going on top, slide your post skirt to the height you want.
- Due to seasonal changes and frost levels, the post skirt is adjustable and can be moved up or down.
Step 3 - Install Columns Over Post Mount
In this step you need to determine the height of the beam and cut the post mounts at the proper spot.
Use a 2x6 or a piece of aluminum from the kit. You can pull this out of the beam or the rafter. You will use this to mark the measurement at every post.
- If you have a laser level or water level and you know how to use them, it may save you a little bit of time.
- But the old-fashioned way is to take the 2x6 beam, put one end on the post (good time to have a helper at this stage), use the other end to mark the post.
- Make sure it is level, use a quick clamp, attach the beam temporarily to the post.
- We are not screwing anything down; the whole point is to measure and mark the beam height. Make a little pencil mark.
- The instruction book has a spot where you can write the measurement from the ground to the mark that is made for each post. (Example - write Post A = 90” in your book.)
- Make sure that you label each post mount to coincide with your book entry.
Take the beam and circle the entire pergola to make sure that you have a level mark on each side of the post.
- That mark is the top of your beam.
- Next, take your tape measure and mark 1” down from the mark.
- Use a speed square and draw a line - that is your cut
- Trace the mark around all four sides of the pergola post mount.
- Use your circular saw and cut on all four sides.
- The last step is to take your post top plug and drop it in the top of your post.
- Once your wood post plug is installed, you can repeat this step for all of your pergola posts.
Next is the cutting of the post sleeve for each one of the posts. The process is the same whether you have a square or round column sleeve.
- Make a mark at the top of your column, corresponding to the post mount. You can use a sharpie and label the column “A” on the top inside.
- The next thing you will want to do is figure out if your kit has 2x6 beams or 2x8 beams. This step is very important.
- There are two ways to find out this information.
- One way is to go to your CAD drawing that came with your kit and it should show you what size beams you have.
- Or two, you can open up the rest of your package and find out whether you have a 6” or 8” main beam.
- Once you know that, you can lay your column sleeve on horses. Go back to the measurements in the book, double check again.
- If it is a 2x6 beam, you want to cut your sleeve 8” shorter than the measurement written in the instruction book.
- If it was a 2x8 beam the cut has to be 10” shorter than the measurements written in the instruction book.
- This leaves room for the base and cap when it is done.
- Make a mark, use a speed square and trace a mark on all sides of the post sleeve.
- Grab your circular saw and cut all sides of the post sleeve.
Once that is done, you can assemble the rest of your post. There are a few different components.
- You start with the post base, column sleeve, column top and the 5x5 sleeve.
- They all fit tightly together.
- When it’s all done you can slide it over the post mount.
When the post base is down, you do want to put a fastener to keep the post base from ever moving.
- It does fit tight, but over time things can shift a little bit.
- So, if you have a deck, you want to use deck screws to screw the base down in all four holes to the deck.
- If it is a patio or something made out of concrete, a tap con will fit there.
- Once the fasteners are all done, there is a little bag labeled column base plugs.
- Use a little bit of glue and attached it to the hole for the finished product.
Step 4 - Attach Pergola Ledger to Structure
Step 4 is about attaching your pergola to the house. At this point, you already mounted your post, cut them to height and know the desired top of your beam. That measurement is really important because the top of the beam is going to be the same measurement as the bottom of the rafter. When attaching to the house, you want to make sure you get into something structural on the house.
- Each kit includes a trim board. If you have a 2x6 rafter, there is a 1x10 piece of Azek trim or if you have a 2x8 rafter, there is a 1x12 piece of Azek trim.
- This board is nice looking but it is not structural.
- It will not hold your pergola in a heavy snow load or heavy storm.
- You want to make sure that it is fastened to something that is structural inside your house.
- If you do not know what is structural inside your house then you may have to consult a professional.
- You may need to put up a ledger plate in addition to the Azek trim, like a structural 2x10 or 2x12 to make sure that the pergola is going to bear proper snow or wind loads.
Assuming that you have the above done, you are going to want to use your rafter hangers and mount it to the plate at the appropriate height. The kit does not come with the screws to attach the hanger to the house. The reason being, we are not sure what you are trying to fasten it to, whether it is masonry or conventional framing. There are eight holes on the hanger, you will need to get heavy duty screws to fasten it at the appropriate top of beam equals bottom of rafter to your plate. Once that is installed, you can hang the rafters.
- The key to making sure the rafters are installed right, is that the aluminum is flush with the back of your rafter.
- If the aluminum is pushed way inside and you go to screw it, you will only get into the vinyl.
- This is not going to be near as sturdy.
- So, you want to make sure the aluminum is all the way flush.
- The piece will slide in, then fasten it through the sides of the hanger to the rafter.
- The kit comes with a fastener bag, look for the one that says Rafter to Rafter
- There are stainless steel screws that goes along with the stainless-steel rafter hanger.
- The screws are 3/8”, screw them in, repeat for all the holes on each side.
- There is a cut out piece on each side of the hanger that should be on the bottom side of the rafter.
- It is important because when you put the trim ring on the rafter, there is a tab down that lines up with the cut out in the hanger.
- If you fit that on improperly, you cannot get the rafter to slide back.
- The goal is, even though there is heavy duty hardware to make your pergola real sturdy, you don’t see any of it.
If you have any questions regarding your rafter spacing, that will all be in the CAD drawing with the instructions.
Step 5 - Install Beams Traditional Method
This step 5 is attaching beams to the post in a traditional method, screwing holes through the beams and using fasteners through the holes into the post.
- The first thing you want to do is double check your measurements from post base outside to outside.
- Grab your tape measure - the example is at 96” which is a 10” Pergola kit.
- Beams are at 10’ and posts are at 8’
- That will give us exactly 1’ of cantilever past this post part.
- If your layout has changed, whether moving the post in or out, and you have a different measurement on the cantilever, it is fine just do the beams according to that measurement.
- You can use the hole jig tool that is provided with your kit. It matches the same size as the post top of the 7” columns. However, this is not true for a 5” post option or a 10” round column. With these columns, you will have to measure from the center of your post piece.
- When using the hole jig tool, have all your beams laid out next to each other, so that you can mark all of them with the same measurement.
- Place the hole jig on the beam leaving a 12” cantilever and with a pen mark the middle of each hole.
- Make sure the aluminum is flush and with a 5/8” bit, make a little hole in all four markings.
- Pull out the aluminum, there should be four nice marks. Spray some WD 40 on the marks.
- Use a step bit, which makes a nice wide hole, and drill through the aluminum.
- It’s nice to have a rag in your pocket to clean up the mess.
- Slide the aluminum back in, there should be nice hole on the vinyl. You may have to clean them out so use the 5/8” bit again.
- Repeat the above procedures for all beams and at both ends.
- Before you put up your beams, it is handy to take a minute, with your tape measure and a pencil and lay out the spacing of the rafters on top of the beam. That should all be listed in your CAD drawing; it should be written down ahead of time. You will have to be up on a ladder with the next steps so it is important to have it completed while you still have things on the saw horse.
- Once all the beams have been drilled get your helper for the next steps.
- Get all your ladders set up a head of time.
- Put the beam on your post.
- Double check the overhangs. Make any adjustments.
- Find your fastener bag - Beam to Post - it is a 3/8” hex head stainless-steel screw.
- Use a 6” extension, screw it in tight. If there is any movement with the beam, continue to push through to secure the screw.
- Repeat the steps for all four holes and for the holes at the other end.
- Attach the plugs to plug the holes.
- Repeat the above steps for the backside of this beam. If you have a freestanding pergola, there will be another beam on the other side. If it is an attached pergola, you are all done attaching your beams.
Step 5 - Install Beams with Attachment Brackets
This Step 5 is about attaching your beam with beam attachment brackets. If you added the brackets to your pergola kit, it is a simple DIY friendly way to attach your beams.
- You are going to start with your post. The first thing you want to know is the post spacing.
- Use your tape measure and double check at the post base (an example - right at 96”).
- Measure one of the beams - which is 120”. Once the beam is put on the post, this will give an extra foot of cantilever on both ends.
- Note: If your pergola was built where you had to change the post spacing a little bit, whether moving it in or out, it is okay, it will still look really nice.
- Once you have the measurement, you are going to attach the bracket to the post.
- Take your first beam attachment bracket and fasten it onto the inside of the top post.
- To do this, check your attach fastener bag and use the bag that is labeled beam attachment bracket to post. It is a longer fastener - it is 2” long and goes through the post and into the wood on the inside and holds it really secure. Fasten all holes and repeat at the other end.
- Take your beam and set it up on the post. Double check cantilever on each side. Check the aluminum, making sure that it is flushed.
- For safety’s sake, clap the beam to the post. This is to prevent it from wiggling when climbing up on the ladder, the beam will not go anywhere.
- Take the bag of fasteners that says beam attachment bracket to beam, same 3/8” used for the other steps and screw the beam right onto the bracket. Make sure to fasten all holes and repeat at other end.
- For the next set of brackets, you are going to attach it to the front beam before you put the beam up.
- First, you need to take the measurement of the space between the post stops (example 80-1/2”). Divide that by 2, which equals 40-1/4”.
- Make a mark on the center on the next beam. The beam is 120”, half of that is 60” - mark your beam.
- Then on each side of that center mark, you will measure 40-1/4” and place a mark for the bracket.
- Place the brackets on the marks, with the area being fastened facing inward and flush with the bottom of the beam. Repeat and mirror the other bracket at the other end.
- Use your fastener that says beam attachment bracket to beam and fasten all holes, repeat at the other end.
- Set the beam to the post, it should fit nice and tightly.
- Next, you will use your beam attachment bracket to post fasteners, sneak in between the beams and attach it, fastening all holes and repeat at the other end.
Step 6 - Rafter Attachment
Your beams are up and now you are ready to install your rafters. The first thing you want to consider is the location of the outside rafters. The CAD drawings have the outside rafter right in line with the column cap, however you can place it where ever you want depending on need or preference. Just make sure that the evenly space out the rest of your rafters.
- Once you decided on where the first location is, make a mark on the top of the beam, come in 2” and make another mark, then place an X in the middle. This is the center of where the first rafter will be placed. Repeat at the other end.
- Then you want to determine the spacing between your rafters. So, take your measuring tape and measure from the center of the X on one side to the other center of the other X (example 94”).
- Whenever you are laying out the rafter spacing, you always work from the center. It will prevent you from taking the factor of the rafter with any consideration by accident. A 10’ Pergola kit comes with 4 rafters - 2 outside rafters and 2 inside rafters. This means that there are three spaces to be divided out evenly. Note: Different size pergolas come with different number of rafters, so make sure to check your CAD drawings.
- For the 10’, it is 94” divided by 3 which comes out to 31-5/16”.
- Use the first rafter X and with your measuring tape, mark your first 31-5/16” and then measure from that mark another 31-5/16”, make a mark.
- The two new marks mark the center of the rafters. So, make sure that you measure 2” and put an X in the middle like you had done for the two outside rafters.
- Now you know the location of all rafters, they should be evenly spaced, so take the measurements and transfer it to the back beam.
- Your rafters should be set out and lined up nice and square so that doing your measurements and markings goes really quickly.
- The measurement from the front beam to the back beam is 95” and the rafters are 120”.
- So, 120” minus 95” leaves 25” of total overhang.
- Split the total amount of overhang in half, leaving 12-1/2” on each side.
- From the end of your rafter, measure 12-1/2” and go 1” extra to 13-1/2” and make your mark. The extra inch will place your hole in the center of the beam.
- The second beam is 7” from the middle of the first beam. Add the 7” to the 13-1/2”, this will give you 20-1/2” place your mark there.
- Take your speed square, double check that the rafters are flush and make your marks on the other rafters. Repeat at the other end of the rafters.
- Next use your bury bit to drill out the rafters. This gives a big hole that will give room to get your drill tool in. The holes will get covered up with the purlin holders.
- Have your rafter to beam fasteners ready and place rafter on beam. Double check that the overhang is 12-1/2”. Screw fasteners into the rafter and make sure that they are all the way down. The rafter may try to pull up, but once the fastener is all the way through, it will suck down and be nice and tight. Repeat the steps to the back beam, lay out the rest of the rafters and continue the process.
Step 7 - Attach Purlin Holders
The next step is to attach your purlin holders to down to your rafters. Before you get started, you need to take into consideration which way your purlins are tilted and which direction the sun is being blocked. If you are unsure which way your purlin should be tilted, please contact a team member for help. Once you know which direction your purlins are going to tilt, you need to double check a couple of measurements.
- Your rafter length is at 120” and your purlin holder length is at 116”.
- The difference being 4”, so that is 2” on both ends.
- Place the purlin on top of the rafter, making sure that it is 2” in from the outside edge of the rafter.
- Get your fastener bag and grab the bag labeled purlin holder to rafter.
- The purlin holder already has holes predrilled into it. If you change your size of the pergola, you may have to trim the purlin holder so that it fits. If you need to do this, make sure that you cut between the holes.
- Drill your fastener into the first hole and then go the end and drill the last hole.
- When fastening the center holes, make sure that the purlin holder is centered on the rafter before fastening.
- Use your plugs to cover the holes as you go.
- Once the first purlin holder is fastened, you will want to attach the purlin holder at the opposite side of the pergola, making sure that it’s set 2” in from the outside edge of the rafter.
- Next you want to use your string line. The string line is important because you want your purlin holders to be perfectly lined up. That way when you get to the step of sliding in your purlins there is no waviness, the purlins just go right in. Use a clamp to hold the string at one end, pull the string to the last purlin holder on the other side, make sure it is tight and clamp that end.
- You should have a taunt line, place the other purlin holders on the rafters, almost touching the line.
- Make sure that the purlins are all tilting in the same direction before screwing them down.
- They should line up perfectly, now you can screw down all the purlin holders.
Step 8 - Install Purlins
This step involves sliding in the purlins. In your kit, the purlins come shrink wrapped together in bundles of ten. Do not open the shrink wrap until you get them on top of the purlin holders, it will save you a lot of fumbling around. Once they are on top, open up the bundles.
- The first thing you should do is install the caps on both ends of the purlins. Two reasons, one it saves you the step later of moving the ladder and two, it makes the purlins slide in through the holes really easily. It kind of acts like a guide.
- If you drop or if one of the metal clips comes off of the cap, just put it on the side, do not try to reuse. The kit comes with about 10 extra caps.
- Just slip the caps in, the stainless-steel clips will hold really tight.
- Once you cap the purlins, sliding them through the openings is relatively simple, although you should and need to be careful if on a ladder.
- When they are all in, you should check to see if the purlin overhang is the same on both sides.
- To do this, push the first purlin all the in, leaving the cap flush. Go to the other side and measure - it should be at 24”. Push it in so that it measures 12”. All of the purlins should match up.
- Once it is all even, find your fastener bag and grab the bag that is labeled purlin holder to purlin. The screw is a standard Phillips head and you only have to put in one screw per purlin.
- The purlins have routed holes already so just make sure that the screw goes right through the top of the purlin. Repeat this step for every single purlin on the pergola.
Step 9 - Caps and Finishing
The last step is to glue on all your caps. The kit is going to come with pergola caps, an end cap for your purlin holders, and a tube of glue.
- Open your glue, a little bit works, it goes a long way. Apply it to the inside rim of the pergola cap, it should just slide right on. Apply it to the inside rim of the purlin holder cap and push it in. Repeat for all the caps on the pergola.
- If you notice any pencil or pen marks, you can use your Mr. Clean magic eraser and remove those markings.
Now that you know how simple our kits are to assemble, it's time to get to work on your own vinyl pergola kit installation.